Tuesday, July 10, 2012

Catechesis of the Good Shepherd

Progress!


Mister Meese working on a child-sized lectern.
I first earned my certification to teach 3- to 6-year-olds the Catechesis of the Good Shepherd material in March 2009.  Ever since then I've been DYING to create the teeny tiny materials we see at church so that I can pass on the faith and help children to fall in love with God.  But every time I've tried to buy or make the many specific items needed I've run into roadblocks and delays.  Until now.

Enter the greatest handyman, who also happens to be a member of the Antiochian Orthodox church.  This week he's been helping make a teeny tiny lectern, altar, prayer table, chasuble holders--you name it!  I hope to show lots of photos soon of a new, improved little classroom. Oh, and someday I hope to catch up with my Level 2 Catechesis of the Good Shepherd training, for 6- through 9-year-olds!

If you've never heard of this beautiful method of passing on the faith, check out Catechesis of the Good Shepherd USA.

Saturday, July 7, 2012

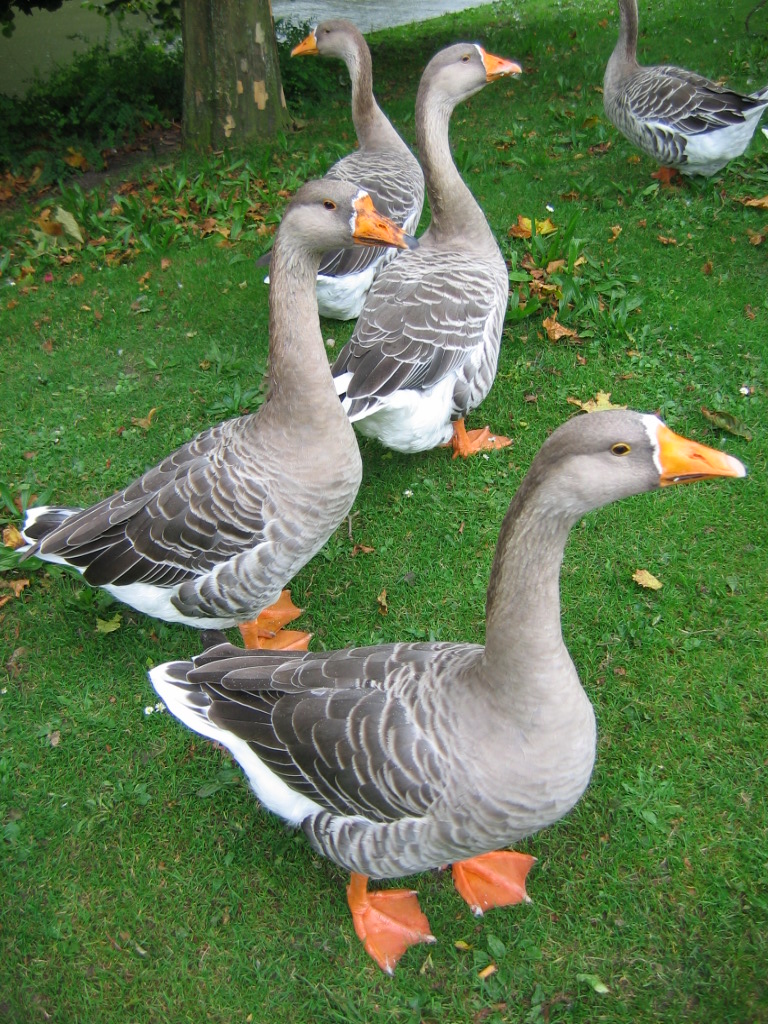
French for Toddlers: The Mean and Noisy Geese!


Here's another delightful, short lesson for mother AND child.  My gratitude to Ellen Green, mother of five and French teacher extraordinaire!

Quizlet French Geese

French Narrative

The Playgroup: Saving Civilization, One Week at a Time


When your kids are little the years may fly by, but the days can drag on!  That's why being part of a weekly playgroup can be a lifesaver, both for you AND your child.  It's okay if the other kids aren't exactly the same age as yours, and it's okay if at first it doesn't seem like you'll have anything in common with the other moms.  

Other ok things: 
  • if dads come, too; 
  • if you are WAY older/younger than the other moms; 
  • if you have WAY more kids than the other moms; 
  • if you work out of the home;
  • if you have a tiny apartment and can't host a playgroup yourself.


Let me explain.  Playgroups are about encouraging one another, not competing.  They are about getting out of the house (or seeing fresh faces if you're hosting it at your house).  They are about sharing your struggles and ups and downs, not trying to act like you've got your act together at all times.  They're about giving and getting advice; begging for prayers when you're scared or worried; borrowing bassinets, getting the low-down on babysitters.  This playgroup has been a ministry to moms with young children as part of my work in the Legion of Mary, an international organization to which I belong.

Our playgroup has been at my house just because my house and backyard are ideal for small children (I used to run a small Montessori school here).  I realize that some playgroups rotate to different houses, but the advantage to staying in one place is that the kids become accustomed to the environment and to one set of house rules.  I don't mind tidying up once per week and I try to keep things somewhat baby-proofed.  

Years ago, when we just had two small children and were living in an apartment I asked the apartment complex management if I could use their clubhouse once per week for a Mom's group or story time.  Not only did they say, "Yes!" but they also let me use the office photocopier to make a newsletter for our group.  Another time, when we lived in Ohio, the local library let me use a meeting room in order to host a Red Cross First Aid or CPR class for me and my mommy friends.  These are just two examples of ways you can organize a playgroup without the worry of cleaning your own home!

It's a blessing now that I can host our weekly playgroup, providing coffee and a comfortable setting.  At first I was providing snacks each week, but now moms usually offer to bring something.


The key to a good playgroup is, first, some ground rules.  Ours has 3 written rules:
  1. RSVP the night before (e-mail works best)
  2. Don't come if you or your child is sick
  3. Only bring children who are up-to-date on their childhood immunizations


Your playgroup can have a different set of rules, but those are ours.  I think we'd agree we also have some unwritten rules, such as:
  • we don't gossip;
  • if we are sharing a struggle related to marriage or home life we try to stay positive and remember the sacred nature of a family;
  • the kids and moms help to clean up before they leave; and
  • we kind of keep the morning more "Mom-focused" than "child-focused."  What do I mean by that?  I mean that instead of bending over backwards to keep the kids entertained and happy, we try to make the most of the opportunity for adult conversation.  We keep things simple.  If we need to re-direct a child or intervene, we try to do it and get back to yacking.

The friendships I've made have been a real blessing over the past two years.  At first the mommies came from my neighborhood and church, but then others joined in.  Some members have moved or have had to step out for a time due to changing nap schedules or morning sickness, but we've also had a new mommy and little boy join us, too.  Two mommies have had new babies and more are expecting, so I guess our group may be growing!

What about you?  Have you had or wanted to have a playgroup?  If so, what have been your ground rules?  Challenges?  Joys?

Magic School Bus Kits in the Mail


It's been super hot outside and I've felt VERY LAZY.  On the 4th of July I stayed air conditioned by breaking out some Magic School Bus science kits that have been coming in the mail maybe once per month or so. (You can buy a similar but slightly more elaborate Magic School Bus volcano kit at this link). During the school year we've been too busy to even open them, so now's the time to rip open the fun!

While one child was making Goop and Superballs, another was making a papier mache volcano with me.  I've done papier mache a few times in my 17 years as a mom, so I've accumulated a little wisdom along the way.  For instance, I'd rather break out the paper cutter to get good, uniform strips of newspaper than tear it.  Also, I'd rather cover all of the surfaces first than plan on cleaning up later.  And with these baking soda-vinegar volcanoes use a deep aluminum pan instead of just a cardboard box top.  It also helps to have a funnel.  (And where would children's science kits be without baking soda and vinegar!  Tesla spent entire summers exploring all the things you could do with them.)  

If you haven't heard of these science kits, you may want to investigate.  You need to read all of the directions first to make sure you have what you need.

The kits come about once per month, but we've saved them for the summer.

After taping down a plastic bottle, you make a cone shape with black construction paper (provided).  Since we've done this type of thing before we felt comfortable making lots of substitutions, such as using a foil pan instead of a box lid and an empty plastic vinegar bottle instead of soda pop bottle.

After cutting up the morning's news with a paper cutter, we had uniform strips to dip into the paste (just one part warm water to one part flour). By the by, the dog under the table is not dead--just resting (the heat got to him, too).

It's a good idea to hold the strip vertically and slide your pointer and tall man fingers along either side to get off the extra gluey stuff (over the bowl, if you please).

An old pro.

It was good that it was over 100 degrees that day--our papier mache strips dried faster!

This kit has you painting the volcano black.  "Peel" loves painting anything, so  she enjoyed this step.

We experimented with different acids:  red wine vinegar, lemon juice and apple cider vinegar.

After a while we also added food coloring.

Thursday, July 5, 2012

Pretty, Happy, Funny, Real 6


Pretty

Beautiful inside and out!
Maura Byrne babysat Alleluia two years ago when I went through Level 2 training of the Catechesis of the Good Shepherd curriculum.  They haven't seen each other in a long while, so when we bumped into her after Mass I had to get a photo!  Maura has started a wonderful ministry, Made in His Image: Seeing Beauty in Suffering

Happy

Solar-powered waving Queen.

Some friends went to England recently and brought me back this waving figure of the Queen Mother.  I'm keeping her above my kitchen sink on the windowsill--she makes me happy!

Funny

Drowning in pool toys......
My in-laws gave us their inflatable pool and we set it up right away.  Look what happens when you stick a hose in one end of the noodle!

Real


My son took this photo while I was presenting Color Box 2 to Alleluia this week.  It's "real" because you can see the laundry I was just folding in the lower left and the vacuum cleaner I was also just using in the lower right!  As moms we don't have a lot of time to sit down with our kids, but we try to make the most out of what we have, don't we?

Wednesday, July 4, 2012

Amish Friendship Bread: A Lesson in Patience!


About 10 days ago I was with my parents in Florida and enjoyed some homemade Amish Friendship Bread.  Never heard of it?  You begin with a "starter" that's just one cup of slime in a ziplock baggie, most likely given to you by a friend, neighbor or family member.  It was sooooooooo good I was glad Mom gave me a baggie of starter to take home on the plane.

The good news is that I passed through security with the starter in my carry-on luggage.  The bad news:  I had to wait 10 WHOLE DAYS to let the starter fester before I could bake the yummy, moist sweet bread (not sure "fester" is the scientific term...........).  I guess it's a good lesson in patience for the kids AND for me.  Sniff, sniff.

Here's the recipe:

Day 1  Do nothing (this is the day you get the starter) **DO NOT REFRIGERATE!
Day 2 - 5  Mush the contents of the bag around by squishing it gently
Day 6  Add 1 c. flour, 1 c. milk, and 1 c. sugar.  Mush.
Day 7 - 9  Mush
Day 10  TA DA!  You made it!  You've been so patient and haven't killed the starter yet!

This part takes patience.  Wait until the baby is taking a good, long nap and you're feeling perky.  Note that you've gotta have some vanilla pudding mix before starting (we had to make an emergency run to the store today because I didn't read the whole recipe.........oops.)

Add to the bag:
2 1/2 c. flour
1 1/2 c. sugar
1 1/2 c. milk

Mix and measure out 4 separate batters of 1 cup each to put into 4 separate ziplock baggies. You will keep one starter bag and give three away to your dearest friends (or the mail lady).

It was pretty hard to take this picture while holding the bag with one hand!


Preheat over to 325 degrees.  Dump remaining batter (from bag) in large mixing bowl and add:

3 eggs
1 c. vegetable oil
1/2 c. milk
1/2 t. salt
1 c. sugar
2 t. cinnamon
1 1/2 t. baking powder
1/2 t. baking soda
2 c. flour
1 large box of instant vanilla pudding

Grease 2 or 3 large loaf pans and mix an additional 1/2 c. sugar and 1 1/2 t. cinnamon.  Dust the pans with half of the mixture.  Pour batter into pans and sprinkle with the rest of the mixture.  Bake for 1 hour (or as long as you can stand waiting for the delicious bread, whose aroma is wafting through the house by now).

Dust pans with cinnamon-sugar mixture before filling.

The batter rises a lot in oven, so not TOO full!

Then dust with the cinnamon-sugar mixture.


We decided to live dangerously and use those mini loaf pans, too, so we just guesstimated the bake times for them.  After about 40 minutes we just couldn't take it anymore--we were so hungry and they were pretty much baked.

If you want to try this bread but don't have a starter, ask around.  If you get really desperate, maybe I can send you some in the mail?  I don't know if that would work, but I'm willing to try!

It would have been nice if I had taken a photo of how the bread turned out, but I was too busy snarfing it down.

Here's some information from Wikipedia on this kind of bread.

Tuesday, July 3, 2012

Homemade Laundry Detergent 101

WARNING:  Though this post may seem only for the desperate, give it a chance!  :)

I've been looking for ways to save money, so when my friend Beth told me she'd started using homemade laundry detergent at a cost of something like 2 cents per load my ears perked up!  "Is it hard to make?"  I asked, and, "Yeah, but does it really get your clothes clean?" and  "How do you store it?"  Beth is a very NORMAL looking--beautiful, actually--30-something mom of 3 CLEAN children,  so any notion that homemade detergent was for Granola Crunchy weirdos went poof.  My husband teased me that soon I'd be just like Granny on The Beverly Hillbillies, stirring a vat of soap strong enough to eat through the wood paddle.  That just made me mad.  So I gave it a try.

Making detergent is easy and the 3 ingredients I needed were easy to find.  Before I describe the process, know that I've only done about 10 loads with it so far and have these reservations:
  1. I am storing most of my detergent in the 5-gallon bucket I mixed it in, but storing a small "current" bottle in an empty orange juice jug.  Keep ingredients and detergent away from small children!  I really need to put my detergent in a different container because it looks WAY too much like the Tropicana juice on the label......
  2. Store the big vat of detergent in a place where children can't get to it.  For us, I've got a big sunken bathtub in our master bathroom that we almost never use because it's so hard to climb into, and that's where the 5-gallon bucket is.  Believe it or not, toddlers have been known to drown in those buckets, so think through where you'll keep it.
  3. Even the first step of grating the Naptha soap (a step which is done in the kitchen) looks edible, so take care then--not a time to get distracted by the phone.
Okay, now that that's said, here's the recipe:  Duggar's Homemade Laundry Detergent


The Fels-Naptha soap and Arm and Hammer Washing Powder was easily found at Wal-Mart, and we had the Borax on hand leftover from an old Blubber project (try that!  that's fun!). 
Flubber recipe  We already had a 5-gallon bucket from my son Tesla's saltwater fish tank days and I used a pot we only use for camping to melt the soap.  One thing I wish I had with me when I was mixing in the big bucket is a HUGE spoon (or wooden paddle like Granny on The Beverly Hillbillies!)--my spoons kept falling into the bucket.  


The soap is soft enough that it's easy to grate.

Grody old camping pot.

I should have been more patient during the melting and stirring phase.

Here Chop is measuring the Washing Soda.  I guess I'll get some cheap measuring cups at the Dollar Store next time so I don't use our "real" kitchen cups next time.

Peel helped me add hot water to the bucket and stir.  It's so heavy at this point that you want it to be in the spot where it will stay.

Fill it to the top, cover, and let it sit overnight.
See--I should've melted and mixed better.

DO NOT make my same mistake and use an orange juice container--it looks too much like something the kids might accidentally drink!
I've bought some stain stick and plan to be more vigilant about treating tough spots earlier rather than later.  I'm also hanging onto some leftover Tide with Bleach in case my homemade stuff doesn't cut the mustard, so to speak.  So far, after 10 loads or so, I'm pretty pleased and ready to save money!

Do you have any more ideas for saving money?  Please send some comments!